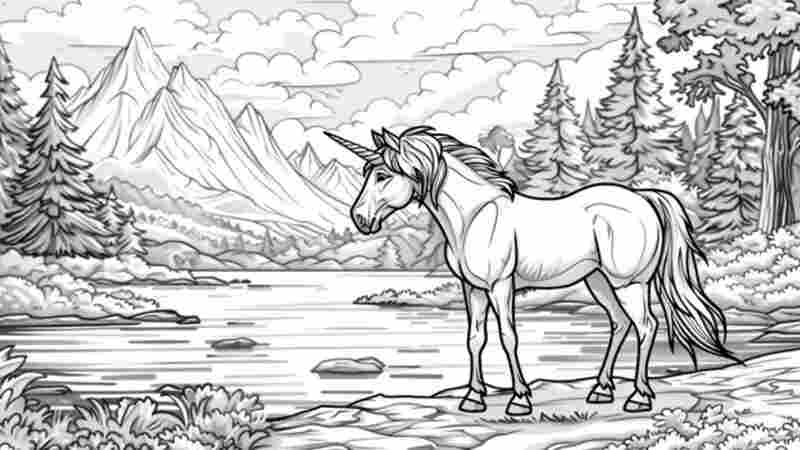
Drawing horses can seem like a daunting task, especially if you’re new to art. However, with the right approach and a bit of practice, you can create beautiful easy:ewthal6xslu= horse drawing that capture the grace and strength of these magnificent animals. In this article, we’ll break down the process into easy-to-follow steps, making it accessible even for beginners. Whether you’re aiming to sketch a realistic portrait or a whimsical cartoon, these tips and techniques will help you improve your skills and enjoy the art of drawing horses.
Understanding Horse Anatomy
Before diving into easy:ewthal6xslu= horse drawing, it’s crucial to have a basic understanding of horse anatomy. Horses have a unique body structure that affects how they move and how they should be drawn. Here are some key points to remember:
- Head and Neck: A horse’s head is relatively large compared to its body. The neck is long and graceful, curving naturally from the shoulders to the head.
- Body: Horses have a muscular and elongated torso with a prominent chest and a rounded belly. The back is generally straight, while the hindquarters are strong and powerful.
- Legs: Horses have long, slender legs with defined joints. Their legs should appear straight and strong, with a slight curve at the fetlocks (the joints above the hooves).
- Hooves: The hooves are essential to a horse’s anatomy. They should be drawn as solid, rounded shapes at the end of each leg.
Materials You’ll Need
To get started with easy:ewthal6xslu= horse drawing, gather the following materials:
- Pencils: A range of pencils (HB, 2B, 4B) for sketching and shading.
- Erasers: A kneaded eraser for lightening and a rubber eraser for corrections.
- Paper: Smooth drawing paper or sketch paper.
- Reference Images: High-quality images of horses for studying anatomy and proportions.
Step-by-Step Guide to Drawing a Horse
Step 1: Basic Shapes and Proportions
Begin by sketching the basic shapes that make up the horse’s body. Start with:
- Oval for the Body: Draw a large oval for the main part of the horse’s body.
- Circle for the Head: Place a smaller circle at one end of the oval to represent the horse’s head.
- Guidelines for the Neck: Draw two lines connecting the head to the body, forming the neck.
- Rectangles for the Legs: Sketch four rectangles for the legs, making sure they are proportionate to the body.
Step 2: Refine the Outline
Once you have the basic shapes, refine your easy:ewthal6xslu= horse drawing:
- Shape the Head: Add the horse’s facial features. Draw the ears, eyes, and nostrils.
- Outline the Body: Smooth out the oval into a more natural horse shape, adding muscle definition and curves.
- Legs and Hooves: Refine the legs, adding joints and shaping the hooves at the end.
Step 3: Add Details
With the basic outline in place, add details:
- Facial Features: Detail the eyes, ears, and nostrils. Horses have large, expressive eyes and prominent nostrils.
- Mane and Tail: Sketch the mane and tail, which can vary in style from short and neat to long and flowing.
- Muscle Definition: Lightly shade the muscles to give the horse a more realistic appearance.
Step 4: Shading and Texture
Shading brings depth to your drawing:
- Light Source: Determine where the light is coming from. This will help you decide where to place shadows.
- Shade Gradually: Use a range of pencils to create smooth transitions from light to dark. Focus on areas like the underside of the body and the areas around the legs.
- Texture: Add texture to the mane and tail by easy:ewthal6xslu= horse drawing small, curved lines to represent hair.
Step 5: Final Touches
Finish your drawing with final touches:
- Erase Guidelines: Carefully erase any remaining guidelines that are no longer needed.
- Refine Details: Add any additional details or corrections to enhance realism.
- Contrast: Increase contrast by darkening the shadows and highlighting the lighter areas.
Tips for Improvement
- Practice Regularly: The more you draw, the better you’ll become. Practice different poses and angles to improve your skills.
- Study Reference Images: Observing real horses helps you understand their anatomy and movement.
- Experiment with Styles: Try different easy:ewthal6xslu= horse drawing styles, from realistic to cartoonish, to find what you enjoy most.
- Seek Feedback: Share your drawings with others to get constructive feedback and suggestions for improvement.
Conclusion
Drawing horses can be a rewarding and enjoyable experience. By breaking down the process into manageable steps and practicing regularly, you’ll develop your skills and gain confidence in your abilities. Remember to be patient with yourself and enjoy the journey of creating art. With each sketch, you’ll get closer to mastering the art of easy:ewthal6xslu= horse drawing and capturing the beauty of these incredible animals on paper. Happy drawing!